 Managing Multiple Instances of MySQL on a Single Host Managing Multiple Instances of MySQL on a Single Host
Nicolaas Coetzee
It is almost impossible these days to talk to a
developer that has not yet at least tried the MySQL database. It is indeed
a very popular database for a number of reasons. A popular argument is that
MySQL is easy to learn, and that's one of the reasons I learned it in
the first place. More recently, though, I discovered that MySQL offers
several other neat features, which are not always promoted to the same
extent as other popular selling points like speed, stability, and, of
course, the dual license.
Most developers or DBAs wish at some point that they
had a second instance of their database -- almost like a copy --
to play with, but there are several other reasons why running multiple
database instances can be an advantage. The case I will present is to
provide a logical separation of databases between different applications.
Of course, there is the argument of just creating multiple databases in
MySQL itself, and there is nothing wrong with that approach -- unless
you start to look at environments like hosting services and also at
performance, especially number of connections and disk IO.
Naturally, running a single instance of MySQL does
provide mechanisms for managing performance, but in this article,
I'll look at using multiple instances of MySQL as a possible
solution. There are no major differences between the traditional method of
running a single MySQL instance and running multiple instances of MySQL. In
fact, you can keep running your standard MySQL instance and have several
other instances running as well.
There are also other uses for running several
instances of MySQL in a production environment. In my own environment, we
focus on consolidating server and running several applications on one
physical server. Although databases still have their own physical server,
we do split the application-specific databases between the various running
instances. Apart from performance considerations, another driver for this
decision was the possibility of being able to split the workload over
several physical servers. Although the split is relatively easy when using
a single instance, it becomes a no-brainer when your databases are already
split on a single host.
Assuming that you are running a shared hosting
environment, running several instances of MySQL could have huge advantages,
the most obvious of which would be to give full database administrator
access to each user but without their being able to see each other's
server instance.
In this article, I will show how you can easily
configure several server instances of MySQL on a single host. All the
examples used in this article were tested on Debian GNU/Linux (Sarge) using
MySQL 4.1 (see Figures 1 and 2).
Configuring MySQL to Run Multiple Instances
Each separate MySQL server instance has the exact same
functionality as a normal, out-of-the-box MySQL server instance. There are,
however, some configuration variables that need to be set up for running
multiple instances. In theory, you could use the same MySQL system database
(called "mysql") for all instances, but this is not a good
idea. You should view each server instance as a completely separate MySQL
installation with its own data directory, log files, and other parameters.
Configuration consists basically of three steps:
1. Preparing each instance's configuration
parameters
2. Preparing the data directory
3. Preparing startup and shutdown scripts (rc.d
scripts)
As previously mentioned, one of our goals is to
configure for performance. It is therefore worthwhile to spend some time on
partitioning. For maximum performance and reliability, at least RAID5
should be used, although other levels are also acceptable or perhaps even
better. Make sure to run several benchmarks as these provide a perfect
opportunity to get to know your hardware.
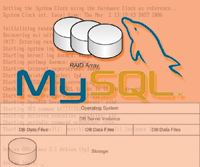
A possible solution is to have dedicated sets of RAID
arrays. Apart from a dedicated operating system array, you would need a
dedicated array for each instance's data directory. In other words,
each instance will be configured to run its data directory on a dedicated
partition mounted only on a single array (see Figure 3).
In this configuration, we are separating the load on
the various tables. In other words, your two applications should minimally
interfere with each other in terms of disk IO. The results are easy enough
to verify by means of benchmarks. If you're paranoid, you can go
further by putting the logs on yet another dedicated array.
Another consideration is the port on which the server
instance will listen. The standard MySQL port is 3306, but you will need to
configure each server instance to listen on a different port (e.g., 3307
and 3308). Your applications each will need to connect to their own
database using these uniquely assigned ports.
Listings 1 and 2 show examples of two server instance
configuration files. You can save the files in the same directory that
contains other MySQL configuration files -- in this example,
/etc/mysql. To facilitate possible future splitting of the server instances
to separate physical servers, I keep all configuration files separated, but
you could have all configuration options in one file if you prefer.
Preparing the Data and Other Directories
Playing with RAID and actual partitioning is a little
bit beyond the scope of this article. There are, however, many useful
articles and HOWTOs available on the Internet. A good place to start might
be the LVM HOWTO. We use LVM configurations on top of the normal RAID5, and
this has helped a lot in cases where you're not quite sure what your
space requirements will be. With LVM, it is easy to resize partitions or
even to quickly create a new partition to add a new mount point (e.g., when
you need to add yet another instance).
Traditionally, I use disk space conservatively, and I
prefer to grow it over time rather than to give a whole disk to a partition
in one go. For this reason I start of with small partitions. Listing 3
shows the output from one of my installations.
Here are some resources I can recommend:
- http://www.tldp.org/HOWTO/LVM-HOWTO/
- http://www.tldp.org/HOWTO/Partition/
- http://www.tldp.org/HOWTO/Software-RAID-HOWTO.html
- http://linas.org/linux/raid.html
If you don't want to create separate partitions,
that's okay. Just create the following directories:
/var/lib/mysql1
/var/lib/mysql2
/var/log/mysql1
/var/log/mysql2
We now have a place for our actual databases and logs
to live. Next, we need to create a basic "mysql" data directory
that holds the default MySQL database. The easiest is to copy the vanilla
MySQL data directory to each of the new data directories.
If you need special access rules (grants), you could
create and test them on the default MySQL server instance before you copy
the base "mysql" data directories to their new destinations. On
my system, I ran the SQL commands shown in Listing 4 to do this. I ran the
commands shown in Listing 5 to prepare the directories.
Note that in Step 1, I stopped the default MySQL
server instance. It is not really a requirement -- but then again, I
am possibly more paranoid than most. Also note that for this article I did
not use a RAID configuration but simply created partitions on separate
physical disks, which is yet another option.
Now everything is in place to start our newly prepared
MySQL server instances.
The "mysqld_multi" Program
Before we create the rc.d scripts, it's a good
idea to first look at the program used to stop and start the additional
MySQL server instances. With the MySQL server package, a program called
mysqld_multi(1) is included.
To start your first instance, type:
# mysqld_multi --config-file=/etc/mysql/my1.cnf --user=root start 1
You should be able to log on to your server instance with the following command:
$ mysql -h127.0.0.1 -P3307 -uroot
To stop the server instance, type:
# mysqld_multi --config-file=/etc/mysql/my1.cnf --user=root stop 1
To start or stop the second instance, you will need to
change only two things:
To start the second server instance, type:
# mysqld_multi --config-file=/etc/mysql/my2.cnf --user=root start 2
And to stop the second server instance, type:
# mysqld_multi --config-file=/etc/mysql/my2.cnf --user=root stop 2
Similarly, you need to change the port number when
connecting with the MySQL client program:
$ mysql -h127.0.0.1 -P3308 -uroot
The mysqld_multi(1) program is well documented, and
you can get more detailed documentation from the official MySQL online
documentation at:
http://dev.mysql.com/doc/refman/4.1/en/mysqld-multi.html
Custom rc.d Scripts
Now it's time to add the final touches. We need
to create our custom rc.d scripts so that our server instances can be
automatically started and stopped during system startup and shutdown. Once
again, there are several options. Listing 6 shows an example script that
controls both processes.
It may be also a good idea to split the init file so
that every instance has its own dedicated start/stop process. This is
especially handy for hosting environments. Also remember to make your init
script(s) executable.
To make the process start or stop automatically during
system startup or shutdown, execute the following commands:
# cd /etc/rc2.d
# ln -s ../init.d/mysqld_multi S99mysqld_multi
# cd ../rc0.d/
# ln -s ../init.d/mysqld_multi K10mysqld_multi
# cd ../rc6.d/
# ln -s ../init.d/mysqld_multi K10mysqld_multi
You can now test by rebooting your system (see Figure 4).
For a good overview of Debian run levels, see:
http://www.debian-administration.org/articles/212
Adding Replication to Your Multiple Instances
Replication is relatively easy to set up and is no
different from replication configuration in normal MySQL server instances.
The steps involved are:
1. Configure your primary server to use binary logs.
2. Set the various server id parameters.
3. Create a user suitable for replication tasks on the
master.
4. Point the slave to the master.
5. Start the slave.
Since we now have two running instances of MySQL, we
can easily configure replication between the two server instances.
Let's assume that instance 1 will be our master, and instance 2 will
be our slave.
For Step 1, modify the master configuration file
(/etc/mysql/my1.cnf) by uncommenting the bottom two lines. For Step 2,
modify the slave configuration file (/etc/mysql/my2.cnf) by uncommenting
the last line.
You should now restart both server instances. After
that, check that binary logging is enabled on the master by running the
following command:
mysql> show master status;
+-------------------+----------+--------------+------------------+

| File              | Position | Binlog_Do_DB | Binlog_Ignore_DB |
+-------------------+----------+--------------+------------------+

| binary_log.000001 |    79    |              |                  |
+-------------------+----------+--------------+------------------+

1 row in set (0.00 sec)
Next, log in to the master and run the following commands:
mysql> GRANT REPLICATION SLAVE ON *.* TO 'repl'@'debian' IDENTIFIED
BY 'slavepass';
Query OK, 0 rows affected (0.04 sec)

mysql> flush privileges;
Query OK, 0 rows affected (0.01 sec)

mysql> show master status;
+-------------------+----------+--------------+------------------+

| File              | Position | Binlog_Do_DB | Binlog_Ignore_DB |
+-------------------+----------+--------------+------------------+

| binary_log.000001 |   235    |              |                  |
+-------------------+----------+--------------+------------------+
1 row in set (0.00 sec)
Note that the "Position" indicator has
moved on. Since we don't want to replicate the user creation command
to the slave, this will be our starting point on the slave. Also note I
have granted to the host "debian", and you may need to modify
this to suit your environment.
For the last two steps, log in to the slave server
instance and run the following commands:
mysql> CHANGE MASTER TO MASTER_HOST='debian', MASTER_PORT=3307,
MASTER_USER='repl', MASTER_PASSWORD='slavepass',
MASTER_LOG_FILE='binary_log.000001', MASTER_LOG_POS=235;
Query OK, 0 rows affected (0.06 sec)

mysql> start slave;
Query OK, 0 rows affected (0.02 sec)

mysql> show slave status \G
*************************** 1. row ***************************
           Slave_IO_State: Connecting to master
            Master_Host: debian
            Master_User: repl
            Master_Port: 3307
                  Connect_Retry: 60
                Master_Log_File: binary_log.000001
           Read_Master_Log_Pos: 235
                    Relay_Log_File: debian-relay-bin.000001
                     Relay_Log_Pos: 4
         Relay_Master_Log_File: binary_log.000001
              Slave_IO_Running: Yes
             Slave_SQL_Running: Yes
             .
             .
             .
1 row in set (0.00 sec)
Testing the replication is as easy as creating a
database on the master and looking on the slave to see whether the new
database appeared.
Detailed documentation regarding MySQL replication is
available at:
http://dev.mysql.com/doc/refman/4.1/en/replication.html
Performance Considerations
As I mentioned previously, one of the key bottleneck
areas on any system running multiple instances of MySQL is disk IO.
Especially when all your databases become busy, you will find disk IO
increasing.
I have also mentioned benchmarks. There are several
options available to put load on a MySQL server, but the trick is in
measuring and reporting on the results. In this final section, I will just
briefly touch on a couple of tools you can use.
On most Linux systems, you will find the sar(1) command very
useful. On Debian, it forms part of the "sysstat" package. If
you have X installed on your Debian server, you may also look at the
"isag" package, which will show you nice graphs from the
sar/sadc utilities data collections.
Once the sar(1) command is available on your system, you can look at
the system IO statistics with the following command:
# sar -b
While using these tools, you should notice that the
various instances of MySQL will perform better if their data directories
are located on separate physical disks. There is an excellent
"Multi-Disk System Tuning HOWTO" available at:
http://www.nyx.net/~sgjoen/disk.html
Conclusion
I am sure the actual exercise time for this article is
far less than the time I spent writing it. Moderately experienced users
should work through all the exercises in less than an hour. Of course, no
two systems are the same, and changes are that some of the examples shown
might not work out of the box on all systems. I suppose that's part
of the joy of IT -- learning from your own mistakes.
I hope you found this article interesting and helpful.
I have made extensive use of multiple instances of MySQL in my work
environment and find it especially helpful in development environments
where just about every developer wants his or her own database.
Nicolaas Coetzee is currently employed by First
National Bank, South Africa (https://www.fnb.co.za/) as the IT Operations Manager
for Cellphone Banking. He has nearly a decade of experience on Linux and
has been using MySQL for the better part of eight years. In his spare time,
he likes relaxing with a nice DVD, and he especially enjoys his
wife's freshly baked rusks in front of the TV. You can reach him at: ncoetzee1@fnb.co.za.
|