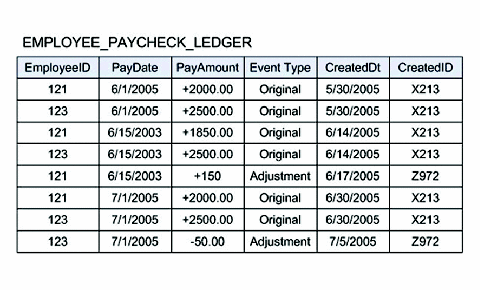
Figure 3:
Ledger table.
Back to Article