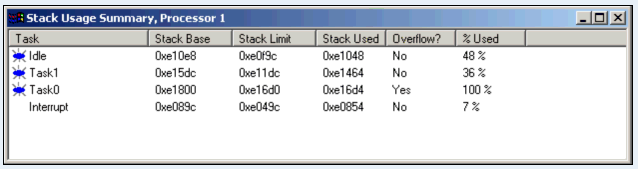
Figure 6:
Determining how much of the stack has been used.
Back to Article