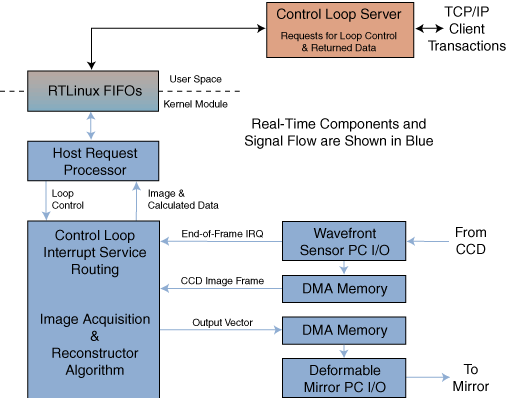
Figure 6: Control and data flow.
Back to Article