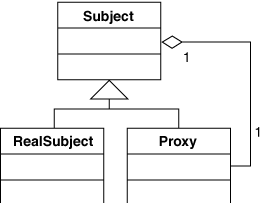
Figure 4: General structure of both patterns.
Back to Article