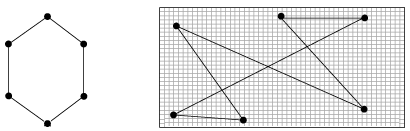
Figure 3: Graph and placement generated by the SA algorithm.
Back to Article