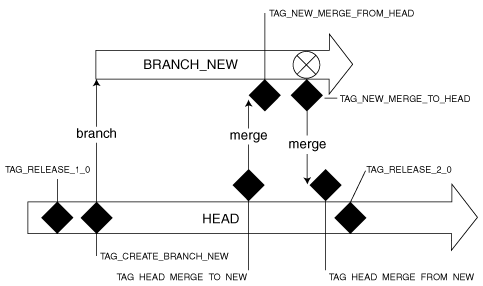
Figure 2: Branch and merge diagram showing a side development branch.
Back to Article