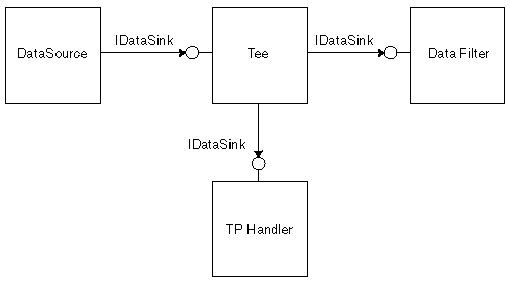
Figure 6: Connecting a testpoint.
Back to Article