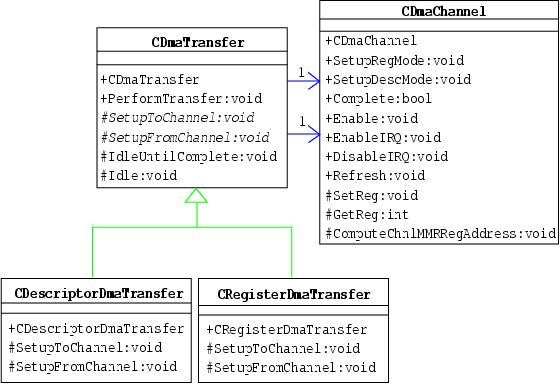
Figure 7: DMA transfer in action.