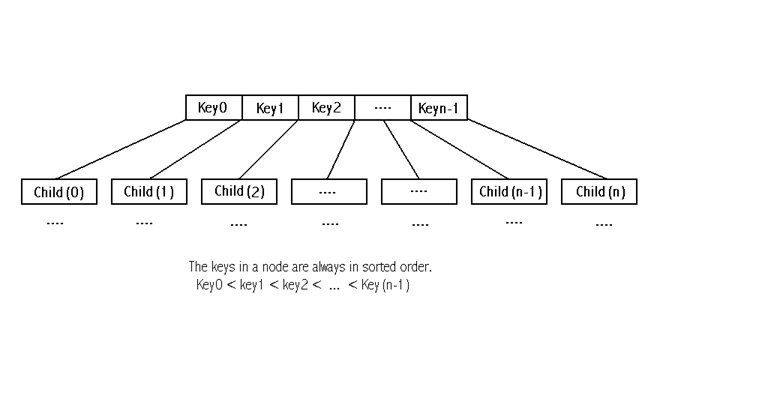
Figure 2: Layout of the multiway tree